Outdoor security cameras have become an essential part of home security systems. Blink outdoor cameras are one of the popular options available in the market. They are wireless, easy to install, and offer high-quality video footage. However, to get the most out of your Blink outdoor camera, you need to adjust the settings according to your needs.

1. Wi-Fi and Power Settings
The first step is to connect your Blink outdoor camera to Wi-Fi. Make sure the camera is within the range of your Wi-Fi network. Once connected, adjust the power settings. You can set the camera to operate in either standard or optimized power mode. The standard mode provides a longer battery life, whereas the optimized mode provides better video quality. Choose the mode that suits your requirements.
2. Motion Detection Settings
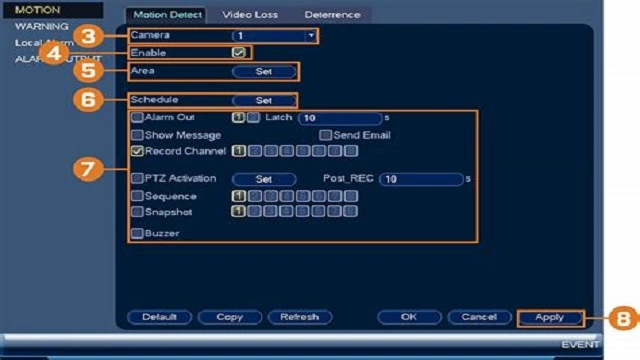
The Blink outdoor camera comes with advanced motion detection technology. You can customize the motion detection settings to receive alerts only when there is significant movement. You can also adjust the sensitivity of the motion detection to avoid false alarms. This will save you the hassle of receiving constant notifications.
3. Video Settings

The Blink outdoor camera offers high-quality video footage. You can customize the video settings to suit your requirements. You can adjust the resolution, frame rate, and bit rate of the video. Higher resolution and frame rate will result in better video quality, but it will also consume more battery life. Choose the settings that balance between video quality and battery life.
4. Night Vision Settings
The Blink outdoor camera comes with infrared night vision technology. You can customize the night vision settings to enhance the quality of the video footage in low light conditions. You can adjust the brightness and contrast of the night vision. This will significantly improve the clarity of the video footage.
5. Schedule Settings
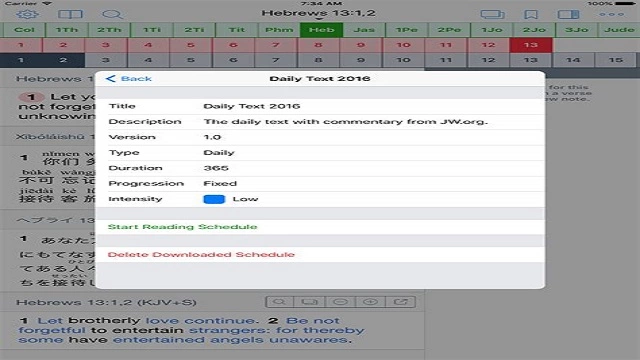
You can set a schedule for your Blink outdoor camera to turn on and off at specific times. This is useful if you want to conserve battery life or if you want the camera to be active only during specific hours of the day. You can also set the camera to record continuously or only when motion is detected.
6. Audio Settings

The Blink outdoor camera comes with a built-in microphone and speaker. You can customize the audio settings to enable or disable audio recording. You can also adjust the volume of the speaker and microphone. This is useful if you want to communicate with someone through the camera.
7. Sharing Settings
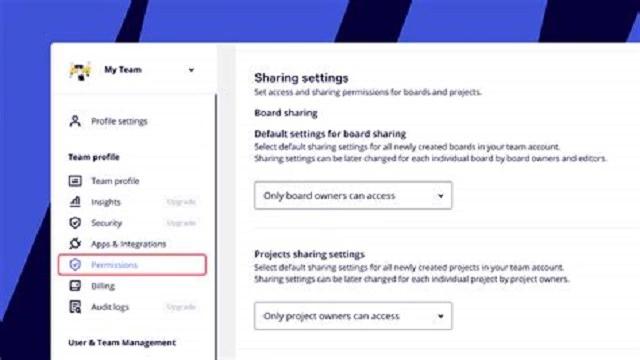
You can share access to your Blink outdoor camera with other people. You can add other users and customize their access level. You can allow them to view live footage, playback recorded footage, or manage the camera settings. This is useful if you want to share the responsibility of monitoring your property.
8. Geofencing Settings
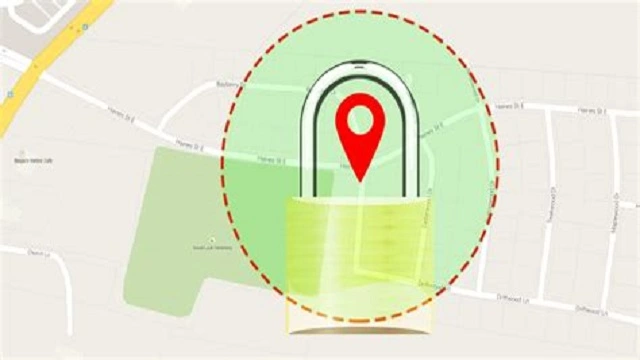
The Blink outdoor camera comes with geofencing technology. You can customize the geofencing settings to trigger specific actions when you leave or enter a specific area. For example, you can set the camera to turn on when you leave the house and turn off when you enter the house. This is useful if you want the camera to operate automatically without having to manually turn it on and off.
9. Temperature Settings
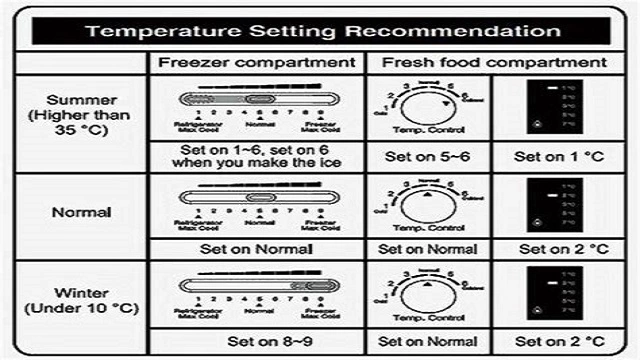
The Blink outdoor camera is designed to operate in extreme temperatures. However, you can customize the temperature settings to suit your specific climate. You can adjust the temperature range at which the camera will operate. This will ensure that the camera does not malfunction in extreme weather conditions.
10. Cloud Storage Settings
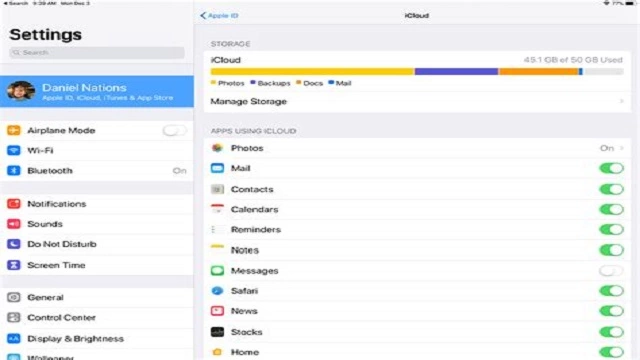
The Blink outdoor camera comes with cloud storage. You can customize the cloud storage settings to choose the length of time for which the footage will be stored. You can also manage your storage space by deleting old footage. This is useful if you want to conserve storage space and only keep the footage that is necessary.
Conclusion
Adjusting the settings of your Blink outdoor camera is essential to get the most out of it. You can customize the settings to suit your specific requirements. The above-mentioned settings will help you optimize the performance of your Blink outdoor camera and ensure that it provides high-quality video footage.
Rekomendasi Lain:
- Spypoint Flex Cellular Trail Camera Reviews Trail cameras have become increasingly popular among hunters and outdoor enthusiasts. The Spypoint Flex Cellular Trail Camera is a popular option that offers a range of features that make it…
- Remote Control Robot with Camera Remote control robots with cameras are becoming increasingly popular in today's market. These robots are equipped with cameras that allow users to control and view their surroundings from a distance.…
- Best Camera for Filming Hunts When it comes to filming hunts, having the right camera is crucial. You want a camera that can capture high-quality footage in various weather conditions, is durable enough to withstand…
- Best AA Batteries for Trail Camera Trail cameras are a great way to capture wildlife and monitor your property. They work by taking pictures or videos when motion is detected. However, trail cameras require batteries to…
- Best Light Bulb Security Camera Reviews Security cameras have become a necessity in today's world, and it's not just for businesses or high-end homes. With the advent of technology, home security systems have become more affordable…
- Blackmagic Design ATEM Mini Pro HDMI Live Stream Switcher Live streaming has become an essential part of the digital world, and the Blackmagic Design ATEM Mini Pro HDMI Live Stream Switcher has made it even easier. It is a…
- My Arlo Camera is Not Recording If you are reading this article, chances are you are having trouble with your Arlo camera not recording. This can be frustrating, especially if you rely on your camera for…
- Stealth Cam Reactor Cellular Trail Camera Reviews Are you looking for a trail camera that will help you keep an eye on your property or hunting grounds without having to be physically present all the time? Look…
- Blackmagic Design URSA Mini Pro 4.6K G2 Blackmagic Design is a leading manufacturer of professional cinema cameras and video production equipment. The company's latest offering, the URSA Mini Pro 4.6K G2, is a game-changing camera that has…
- Security Camera DVR with Hard Drive Security cameras and DVRs (digital video recorders) have become an essential part of modern security systems. They are used to monitor and record activities in homes, offices, and public places.…
- Best Video Camera Under $1000 When it comes to creating high-quality video content, having the right equipment can make all the difference. While there are certainly expensive cameras on the market that can produce stunning…
- Brookstone Wifi Camera with Tilt and Pan The Brookstone Wifi Camera with Tilt and Pan is a state-of-the-art camera that can be used to keep an eye on your home or office. The camera is designed to…
- Do Blink Cameras Work with Google Home? If you own a Blink camera and a Google Home, you may be wondering if the two devices are compatible. The good news is that, yes, Blink cameras work with…
- Power Bank with Spy Camera Thanks to the advancement in technology, we now have a wide range of gadgets and devices that can help us keep our homes, offices, and personal belongings safe and secure.…
- Camera Car Mount with Polarisers When it comes to capturing stunning footage while on the move, nothing beats a camera car mount with polarisers. This versatile equipment enables filmmakers to shoot high-quality videos from a…
- Motion Sensor Camera with Night Vision When it comes to securing your home or business, one of the best investments you can make is a motion sensor camera with night vision. These cameras are designed to…
- Wireless WiFi Light Bulb Camera Security Camera Reviews Home security is a vital aspect of modern living, and with the advancement of technology, it has become easier to secure our homes. One of the latest innovations in home…
- Blink Camera Flashing Red and Not Recording: How to Fix It If you own a Blink camera, you might have encountered a problem where the camera flashes red and doesn't record anything. This issue can be frustrating, especially if you rely…
- Sony W800/B 20MP Digital Camera with 5x Optical Zoom The Sony W800/B is a compact digital camera that packs a powerful punch. With a 20MP sensor and 5x optical zoom, this camera captures stunning photos and videos with ease.…
- Bluetooth Speaker with Spy Camera: The Ultimate Combination… Bluetooth speakers have become a ubiquitous accessory for anyone who loves music, podcasts, or audiobooks. They can be carried anywhere, have excellent battery life, and offer impressive sound quality. But…
- Best Light Bulb Camera 2022 Home security is a top priority for many homeowners and renters, and one popular way to keep your property safe is by using a light bulb camera. These devices offer…
- Security Camera with SIM Card Security cameras have become an essential part of our daily lives, especially when it comes to ensuring the safety of our homes and workplaces. The latest addition to the security…
- Camera That Plugs into Light Socket Have you ever wondered if there is an easier way to install a security camera system? If you have, then you should know that there is a camera that plugs…
- Best Video Camera for Hunting Adventurer When it comes to hunting, having a video camera can be beneficial in many ways. Not only can it capture your adventure and create memories, but it can also be…
- Why is my Wyze Camera not Recording Events? Wyze Camera is a popular security camera that guarantees safety and security by recording events in your home or office. However, some users have been experiencing issues with their Wyze…
- Protocol 6182-7XBH Kaptur GPS II Wi-Fi Drone with HD Camera The Protocol 6182-7XBH Kaptur GPS II Wi-Fi Drone with HD Camera is one of the most advanced drones on the market. With its cutting-edge technology and top-of-the-line features, this drone…
- Turn Old Phone into Security Camera without Internet Do you have an old phone lying around your house that you no longer use? Instead of throwing it away, why not turn it into a security camera? In this…
- Can Blink Cameras Record 24/7? Blink cameras are a popular choice for home security systems. They are affordable, easy to install, and come with many features. One question that many people have is whether or…
- Best Replacement Batteries for Blink Cameras If you own a Blink camera, you know how essential it is to have a reliable battery. The battery is what powers the camera, and without it, you won't be…
- Best Spy Camera with Longest Battery Life When it comes to spy cameras, one of the most important factors to consider is battery life. After all, what good is a spy camera if it dies before you…