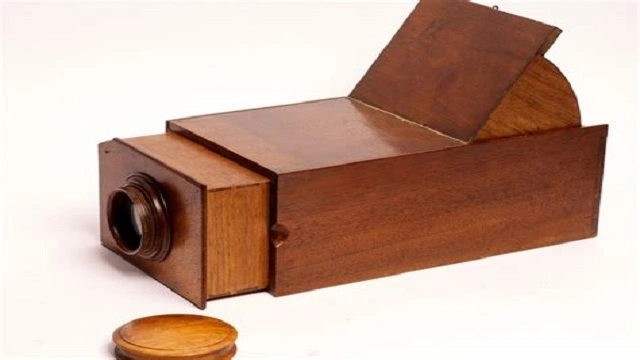
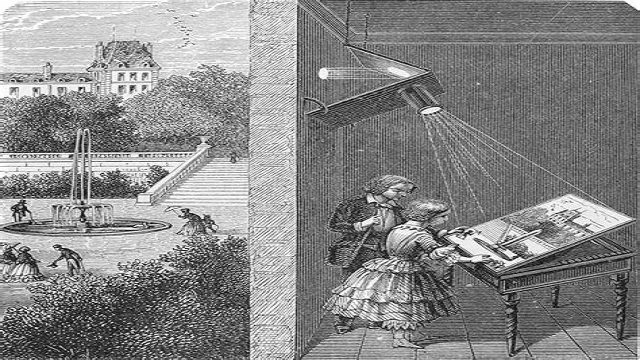
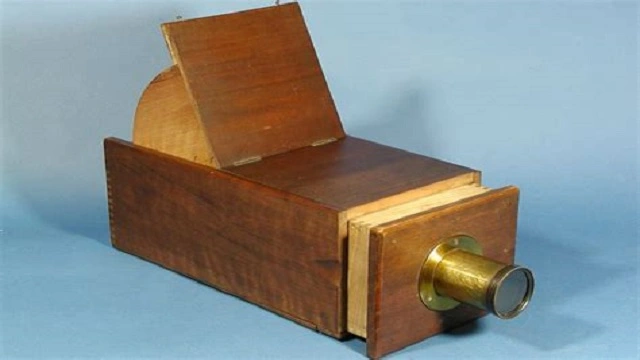
Have you ever heard of a camera obscura? It’s a simple device that can be used to create stunning images. A camera obscura is essentially a box with a small hole in one side. When light enters the hole, it projects an inverted image of the outside world onto the opposite side of the box. Sounds cool, right? In this article, we’ll show you how to make your own camera obscura.
Supplies You’ll Need
Before you get started, you’ll need a few supplies. Here’s what you’ll need:
-
- A cardboard box (any size will work, but a larger box will create a brighter image)
- A sharp knife or scissors
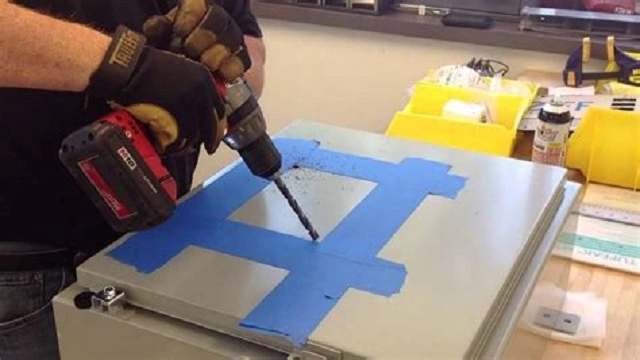
Step 1: Cut a Hole in the Box
Use your knife or scissors to cut a small hole in one side of the box. The hole should be about 1 inch in diameter. Make sure the edges of the hole are clean and smooth.
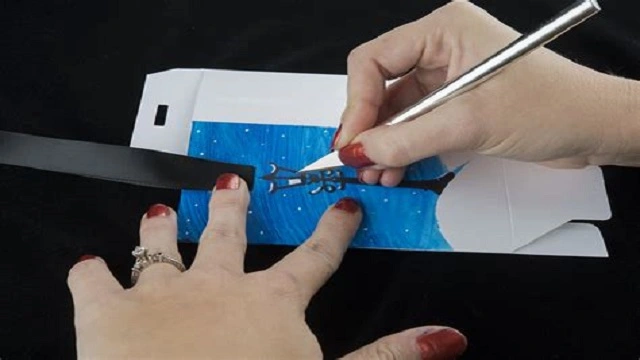
Step 2: Cover the Hole with Aluminum Foil
Cut a piece of aluminum foil that’s slightly larger than the hole you just cut. Place the foil over the hole and use tape to secure it in place. Make sure the foil is smooth and flat.
Step 3: Cut a Square in the Opposite Side of the Box
Use your knife or scissors to cut a square in the opposite side of the box. The size of the square will depend on the size of your box. Make sure the edges of the square are clean and smooth.
Step 4: Cover the Square with Tracing Paper
Cut a piece of tracing paper or wax paper that’s slightly larger than the square you just cut. Place the paper over the square and use tape to secure it in place. Make sure the paper is smooth and flat.
Step 5: Test Your Camera Obscura
Now it’s time to test your camera obscura. Find a bright area outside and point the hole in your box towards it. The image should appear on the tracing paper inside the box. If the image is upside down, don’t worry – that’s normal!
Step 6: Experiment with Your Camera Obscura
Now that you’ve made your camera obscura, it’s time to experiment with it. Try taking pictures of different objects and scenes. You can even use your camera obscura to project images onto a wall or screen. The possibilities are endless!
Conclusion
Creating your own camera obscura is a fun and easy DIY project that anyone can do. All you need is a few simple supplies and a little bit of patience. With your new camera obscura, you’ll be able to create unique and beautiful images that are sure to impress.
Rekomendasi Lain:
- Motorcycle Helmet with Rear View Camera If you're a motorcycle rider, you know how important it is to have good visibility while on the road. Unfortunately, traditional motorcycle helmets can limit your field of view, making…
- Canon 514XL Super 8 Camera If you are a fan of vintage cameras, then the Canon 514XL Super 8 Camera is definitely worth checking out. This camera was first introduced in 1976 and was the…
- Best Camera for Boudoir Photography Boudoir photography is a genre of photography that captures intimate and sensual images of individuals. To create stunning boudoir photographs, a high-quality camera is essential. In this article, we will…
- How to Make a Reel with Photos Creating a reel with photos is a great way to showcase your memories and tell a story. It can be used for various purposes, including weddings, birthdays, and graduations. In…
- Camera Car Mount with Polarisers When it comes to capturing stunning footage while on the move, nothing beats a camera car mount with polarisers. This versatile equipment enables filmmakers to shoot high-quality videos from a…
- DIY Cell Phone Camera Wiring Diagram Cell phone cameras have become an integral part of our daily lives. We use them to capture memorable moments and share them with our loved ones. However, have you ever…
- Car Surveillance Camera 360 Degree Are you worried about the safety of your car? Do you want to keep your vehicle secure at all times? If so, a car surveillance camera 360 degree is the…
- Wilson Camera Digital Lab & Portrait Studio Wilson Camera Digital Lab & Portrait Studio is a world-class photography studio that offers a complete range of photography services. Whether you need professional portraits, family photos, or event coverage,…
- Camera That Plugs into Light Socket Have you ever wondered if there is an easier way to install a security camera system? If you have, then you should know that there is a camera that plugs…
- Do Blink Cameras Work with Google Home? If you own a Blink camera and a Google Home, you may be wondering if the two devices are compatible. The good news is that, yes, Blink cameras work with…
- Safe Cam 360 Light Bulb Camera Are you looking for an easy and affordable way to monitor your home? Look no further than the Safe Cam 360 Light Bulb Camera. This innovative device combines a light…
- Camera Brand that Merged with Minolta Minolta Corporation, a Japanese camera manufacturer, was a prominent player in the photography industry for many years. However, in the early 2000s, the company faced financial difficulties and decided to…
- RC Car with FPV Camera Remote-controlled cars have been around for decades, but with the advent of modern technology, they have become more advanced than ever before. If you're an RC car enthusiast, you may…
- How to Achieve Aesthetic iPhone Camera Roll Filters It’s undeniable that the iPhone camera is one of the best smartphone cameras in the market. With its powerful features, you can capture stunning photos anytime and anywhere. But did…
- How to Select Multiple Photos on Mac As a Mac user, you might want to select multiple photos at once. This could be for various reasons such as organizing your photos, deleting unwanted photos, or sharing multiple…
- Spypoint Flex Cellular Trail Camera Reviews Trail cameras have become increasingly popular among hunters and outdoor enthusiasts. The Spypoint Flex Cellular Trail Camera is a popular option that offers a range of features that make it…
- Camlyte Light Bulb Camera Reviews Security cameras have become a must-have in every household, and with the advancement in technology, they are now available in different shapes and sizes. One such camera that has caught…
- MKBHD Blind Camera Test 2022 If you are a photography enthusiast or a professional photographer, you must have heard about the MKBHD Blind Camera Test. This is an annual event that tests the best cameras…
- Dog with Nose in Camera Dogs are known for their adorable nature, and they never fail to make us smile. One of the cutest things that they do is put their nose in the camera…
- Binoculars with Built-In Camera Binoculars with built-in cameras are a great way to capture memories while enjoying the outdoors. These devices combine the functionality of binoculars and cameras, allowing users to capture images and…
- How to Tell If Blink Camera is Recording If you're a Blink camera owner, you know the security and peace of mind it provides. Blink camera is a wireless home security system that provides HD video surveillance, motion…
- How to Add Highlights on Instagram from Camera Roll Instagram is one of the most popular social media platforms in the world, with over 1 billion active users. One of the features that make Instagram stand out is the…
- Motion Sensor Camera with Night Vision When it comes to securing your home or business, one of the best investments you can make is a motion sensor camera with night vision. These cameras are designed to…
- Bluetooth Speaker with Spy Camera: The Ultimate Combination… Bluetooth speakers have become a ubiquitous accessory for anyone who loves music, podcasts, or audiobooks. They can be carried anywhere, have excellent battery life, and offer impressive sound quality. But…
- Canon Sure Shot Film Camera For those who are passionate about film photography, the Canon Sure Shot Film Camera is an excellent choice. This camera is easy to use, compact, and produces high-quality images, making…
- DIY Drone Kit with Camera: Building Your Own Aerial… Are you interested in aerial photography but don't want to spend a fortune on a ready-to-fly drone? Why not build your own drone kit with a camera? Not only is…
- Sony Camera Drivers for Mac As a photographer, it's important to have the right tools to capture and edit your images. One of the most popular camera brands out there is Sony, and if you're…
- How to Turn Off Flash on Canon Camera Flash photography can be a great way to capture stunning images, but there are times when flash is not desired. If you want to turn off the flash on your…
- USB Hidden Camera with Audio Are you looking for a way to keep an eye on your home or office without anyone knowing? A USB hidden camera with audio may be the perfect solution for…
- Best Cameras for Car Photography Car photography is a popular niche in the world of photography. Whether you are a car enthusiast or a professional photographer, capturing the beauty of a car is a challenge…